Wednesday, January 30, 2013

It's a Sew Day!!!

The schools are closing, the snow is falling, and my students cancelled. That sounds like the perfect sew day for me.
I also decided it was the perfect day for a pot of vegetable soup in the Crock Pot.
Since the doctors suggest I eliminate meat and dairy from my diet I eat a lot of vegetables, so not only is this perfect for my diet but one of dear hubby's favorites so I will provide you with the recipe today.
Vegetable Soup
2 cups frozen carrots
1 cup frozen corn
1 can green beans, undrained
1 onion, finely chopped
2 cups diced potatoes, I just scrub mine well and leave the peeling on
2 cups finely shredded cabbage
2 cups water
1 can diced tomatoes
1 8oz. can tomato sauce
1 tsp. seasoned salt
Just put in a large crock pot on high for about 6 hours and you're ready to enjoy.

Now it is mandatory that you go sew for those 6 hours, because you must work up an appetite for your soup.
For me, I have a list:

1. Work on the Pineapple blocks for the guild quilt, more about that tomorrow
2. Audition some background fabric for my cancer quilt
3. Start the 16 heart blocks for Angelyn's quilt.

Hope you are able to get some sewing in today,,,,if not, just enjoy the journey!

Monday, January 28, 2013

Triangle Tango: A Free Pattern

Since I had given tutorials on Half Square Triangle and Square in a Square I thought it would be fun to put them together into a quick table topper/wall quilt for you to try out the tutorials.
First we will construct the center.
Cut 8 color A squares and 8 Color B squares and following the tutorial for Perfect Half Square Triangles, make 16 HST's.
After trimming, your HST's should measure a perfect 3 1/2". 
Arrange the HST's as pictured above.
Now sew them into rows.
And  then sew two rows together, then the other two rows and join the center seam.  Press well.  I made sure I pressed each row alternately so my seams would be nestled together nicely.
Set this aside and make the Square in a Square units.

You will need 16  4 1/2" squares and 64  2 1/2" squares.  Follow the tutorial for making Square in a Square blocks.
Sew two rows of 3 Square in a Square units and 2 rows of 5 Square in a Square units.  I chose to press the seams open to reduce bulk on these units since I would not be nestling seams.

Sew the 3 block rows to the top and bottom and the 5 block rows to the sides.  I am not a pinner and if the individual blocks are square they should sew together without cutting off points, but if you are unsure, pin where the half square triangle are and have your Square in a Square on top.  If you sew about one or two threads to the right of the top of the Square in a Square blocks, the points should come out perfect.
The piece measures 20 1/2" and will finish 20"  feel free to add more borders if you wish.  For me this will serve a dual role as a table topper and hot mat .  My ever practical hubby made a comment as we were getting ready to serve Christmas dinner that we only had small hot pads and we needed one large one instead of three small once to cover the table to hold a hot casserole or the liner pan from the roaster.  So this piece will have Insul Bright and Warm and Natural for batting and will be a table topper until it is pressed into service as a jumbo hot pad.
If you make the pattern leave me a comment and tell me how you got along.  Hope you enjoy the pattern.  Have a great day!

Sunday, January 27, 2013

Weekend Sew Time

I generally don't get a lot of quality sew time during the week, but knew this weekend might allow me to finish the first 32 blocks of the Log Cabin Heart quilt for Angelyn and her husband for their 33rd wedding anniversary.  The next set of blocks will be Log Cabin Hearts and there are only 16 of them so with a few more hours of sew time I should have all my blocks for the top.
I really like the small squares going diagonally across the block.  Since I chain sewed these blocks, I had all 32 before I knew what they looked like.  For sewing the blue logs I just chained each of my blocks one after the other on one of my strips of fabric and then cut them apart and squared them up.  For the white log that was not possible.  Each white strip had to be cut to the correct size and a dark blue square sewn to the end of it and then each of them was sewn to the block.
The more I look at these squares, the more anxious I get to experiment with a scrap quilt using this block pattern.   Ohhh so many quilts, so little time.  Have a great day.

Saturday, January 26, 2013

Preparing Paper Piecing Patterns

I am on the committee for our Opportunity Quilt this year and the chosen pattern is a Pineapple to be paper pieced by the committee.  We met and talked about the usual things, size, colors, borders, etc.  A trip was made to our local quilt shop to purchase fabric and a sew date at my home was scheduled for next week.  The fabric was left with me and I volunteered to print the foundation paper.
I had previously searched Quilter's Cache for a pattern and had printed it off using regular paper on my little inexpensive printer I use with my Electric Quilt.  I measured the test square and it was perfect.  So this morning my wonderful hubby volunteered to run the copies onto the foundation paper for me on his printer.  I was every so appreciative of his offer and asked him to let me measure one before printing the remainder.  The printing took an unusually long time and that in its self raised a red flag for me and sure enough upon measuring the pattern was off.  Not only the test square but the pattern itself was off considerably.  We discussed using my little printer but hubby wanted to try another larger  printer.  Hubby likes things like that so we are a two person household with three working printers and I was so happy that was the case because the larger printer printed quickly and 100% accurately.
So my point in all this to measure, measure, measure when preparing your foundations for paper piecing.  I know this has been said a lot but can't be stressed enough, same brand of printers but different models do not print the same.
Enjoy your weekend and I hope you get to set aside a little time for quilting.

Friday, January 25, 2013

Square In A Square Tutorial

Last week one of my students asked "how do I  know the formula to make different blocks in the size I want without a pattern"?  Every once in a while, a new student comes along that likes "to do her own thing" along with learning from printed pattern, this is that kind of student.  She drew for me a half square triangle, a square in a square and flying geese.  I went over the drafting of each of these three blocks and thought I would go over a square in a square in this tutorial.
As an example we will work with a 4" FINISHED block.  For each block you will need 1- 4 1/2"
square, this is the same size as your desired block before it is finished and 4- 2 1/2"  squares.  These squares are half the size of the block before finishing.
(Another example if you wanted a 6 " finished block you would need 1- 6 1/2" square and 4- 3 1/2" squares.)  You always divide the finished block size in half and add seam allowance to get your smaller square dimension.
Draw a diagonal line on the wrong side of each of the 2 1/2" squares.
Lay two squares with the diagonal lines going in the same direction on your large square.
Sew on the two drawn lines.
Press the triangles open to make sure everything is square.
Lay the triangle back down and trim to a 1/4".
Place the other two drawn squares on your block making sure the diagonal line is in the proper position on each square, and sew on diagonal line.  After sewing press and trim.

The Square in a Square now measures 4 1/2" and will finish 4".
Have a fun day and enjoy the journey!

Thursday, January 24, 2013

It's Visit Your Local Quilt Shop Day


I have always been an advocate of shopping at your Local Quilt Shop.  Not only are they a wealth of inspiration, but are close at hand when you are of need of fabric or supplies.
If you are in the Kansas City, Missouri area, it would be worth your drive to the beautiful small town of Excelsior Springs, where the Wooden Spool is located.  The shop is nestled in the heart of down town among other quaint shops.The owner Jamie always greets you with a smile and is willing to help you in any way she can.  She carries the latest fabrics, a nice variety of threads, patterns, books and notions.
True inspiration comes from the ever changing samples that adorn her walls.  Beautiful projects of all sizes.  Generally a kit is provided, but you will always find the book or pattern and fabric variety to choose your own unique style.
She keeps her customers busy with, Block of the Month's, Mystery Quilts, classes and clubs.
Don't forget to visit your Local Quilt Shop and tell them how much you appreciate them.

Wednesday, January 23, 2013

Giving Your Quilts a Little TLC

We all love making quilts and take care in their construction, choosing the best color combination, precision piecing or applique, appropriate quilting designs  and so on.  One area where I admit I fall short is refolding of my quilts in a timely manner.
About a week ago I was pulling a few quilts to change out for Valentine decorating season and came upon a piece that I had forgotten about, I recognized the backing and realized it was a Valentine piece and also remembered I had not displayed it last year.....so how long had it been lying on the bottom on the quilt storage shelf?  I'm guessing about 2 years.  Oh my, that is not good.
And my concerns were realized when I opened the quilt.  Deep creases did not shake out,  You can tell just how it was folded.  This photo was taken this morning and the creases remain almost as prominent as when it was hung about a week ago.
Leaving the piece folded on the same crease line for a period of time, can break down the fibers and as the years pass the fabric will deteriorate and become frayed in that area.  When I take it down for storing I will fold it in thirds and make sure it is not on the bottom of the stack.
A few other tips for preservation of your quilts is to never lay them directly on a wooden shelf, each quilt should have its own protective bag or pillowcase to keep it free of dust and chemicals that the quilt may come in contact with.  Any substance that has been applied to protect the shelf could be harmful to your quilts.  Many think a cedar chest is a safe place for their quilts, but cedar chests are designed for woolens and can cause brown spots to form on our cotton quilts.  And please don't store your quilts in a plastic bag.  Cotton being a natural fiber needs to breathe and that is not possible if it is encased in plastic and also I personally know a lady who had placed her quilt in a large black trash bag to take to the quilt show and had set the bag by the door and went to retrieve other items, upon returning she had found that her husband thinking it was trash and thinking he was being very efficient put the bag on the curb.  They ran to the curb but the disposal people had already  collected the bag and all of her hard work was gone.  If you must put your quilt in a plastic bag make sure it is clear.
Think I will go check on my other quilts to see if they need a little TLC.  Have a great day.

Tuesday, January 22, 2013

Using Strips For Half Square Triangles

For relaxation I generally find myself in front of the television with my laptop in hand and Electric Quilt on my screen.  That is where I found myself last evening.  I love playing with EQ and I hit upon a design I really liked for a scrap quilt.  It is going to require LOTS of half square triangles with scraps and a background.  Knowing that I didn't want too many HST's of any one scrap, I decided I didn't want to use squares to make my HST's so awoke at 4:30 this morning trying to decide on the best method.  I knew I would really like to use my 2 1/2" strips so proceeded as follows:
I grabbed half a strip of background and the same of a scrap strip.  I placed the background on my sandpaper board and drew lines every 2 1/2 inches.
I was able to get 8 squares out of my strip, then I drew diagonal lines in a rick rack pattern between each of my 2 1/2" square lines.
After layering the marked strip with my scrap strip, I headed to the ironing board and pressed the two together using just a spritz of Best Press.
Before leaving the ironing board I placed a few pins to keep my strips from shifting.
After placing my open toe foot on my machine, I proceeded to zigzag my way across the strip sewing on my diagonal lines.
The squares were then cut apart on the drawn line.
Before trimming my squares, I went back to the ironing board and pressed the squares open and back onto the other side of the square to insure my square was square.  You wouldn't want a square that wasn't square. Now, say that rapidly 5 times.  (Sorry for the bit of humor)  If all sides match up without seeing any of the fabric from the side you will be trimming. your square should be correct.

Fold the pressed side back down and lay a cutting ruler with the 1/4" line on your sewing line and trim.
Don't throw away those trimmed triangles...they make great corners for string blocks!

This method gives you perfect HST's, as does other techniques.  The printed paper products can give a similar result, but for one, I didn't have them in the size I needed, and second I tend to not like to tear away paper.  And for me, the drawing was faster than tearing away paper.  But try the paper products sometime and choose the technique that works best for you.
Another wonderful day to enjoy life....enjoy your journey.

Monday, January 21, 2013

Stash Control

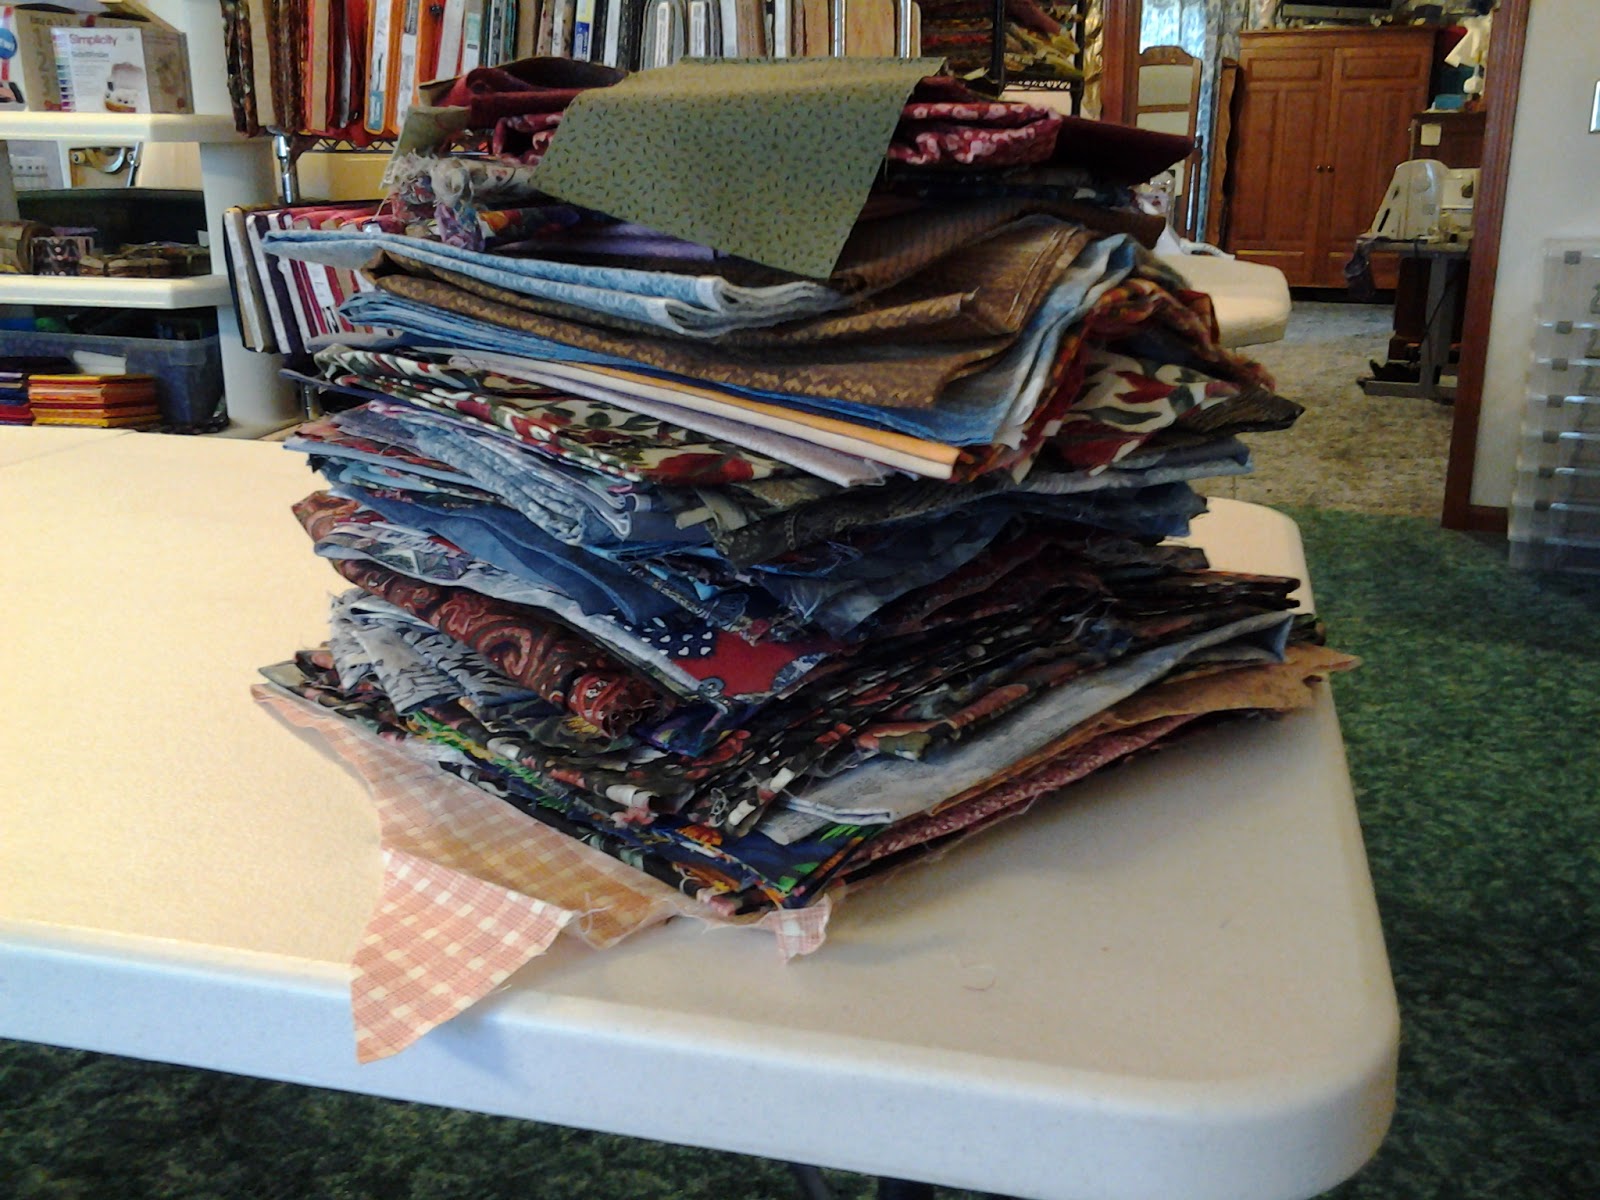
Since my stash started in the early '80's I have a very large stash with colors to depict each era, muddy browns, country blue and the early Hoffman's which I still pull today and enjoy incorporating into today's quilts.  But some of them just need to be out of my studio.

My "current" stash is neatly wrapped on plastic board and color coordinated for easy viewing.

But unfortunately there are more shelves of older fabric in piles than those that are neatly shelved.  It looks like a busy week for me with at least 2 students and some days 3, every day this week, so personal sewing time will be at a minimum, unless it is evening sewing, so this may be a good time to pull this fabric and start the sorting process.
My older stash has made numerous charity quilts and has been gifted to the beginning student for some practice.  But when it comes to searching through this fabric for a project it just doesn't happen.  Usually time is of the essence for me and searching through a pile of fabric piece by piece is just too time consuming, so while doing some piecing yesterday evening I devised a plan of attack for these piles.
First, I will divide them into three categories:
 1.  Those fabrics that will readily fit in nicely with what I work with now.
 2.  Fabrics that would make nice charity quilts without being too dated.
 3.  The fabrics that are so dated will be cut into 1 1/2 inch strips.  Being that small and mixed with       other brighter, newer fabrics will hopefully allow them to just go along with the crowd.

 Being a scrap quilt lover is beneficial to #3 because most fabrics play well with each other.
And yes, there will probably be a few fabrics that are just not compatible for any of the three groups and they will be tucked away to make kits for my volunteers to make rag quilts.  These rag quilts will be used as pallets and coverings for the babies of Haiti.  I have a friend that does a mission trip to Haiti each year and she and the others in her group hand carry these quilts to Haiti and hand them out to the mothers.  She tells me a lot of the mothers have nothing to lay under the babies or over them for that matter so the quilts we send are not pretty by our standards but appreciated by those that receive them in Haiti.  It is amazing how many budding quilters have resulted from doing a charity sew-in for these quilts.  The rag quilts are so easy and fun it takes the fear of sewing away for a newbie, while they do something for others.
I'll keep you posted how I get along.  Have a  great day!!

Sunday, January 20, 2013

My New Quilt Ladder

Yesterday was another beautiful day of 63 degrees before our temperatures plummeted to 22 degrees overnight, so dear hubby and I decided to take advantage of the beautiful day and headed out on another day trip to see what we could find.  Though having a lot of fun looking around I didn't find any thing that caught my fancy until the very last shop.
Having been a quilter for MANY years, I have lots of quilts and granted they cover lots of the walls, chairs and bed in my home.  I still have many quilts residing in a closet, so when I saw this quilt ladder with a shelf at the bottom I was delighted.  I went to another area of the store in search of hubby to show him my find.  He looked it over and deemed it sturdy enough to serve my purpose and said, "where are you going to put it?"  My ever practical hubby had raised a very good point, finding an empty wall would be challenging.  But we both agreed it was a very good deal and we would "find a place".
I awoke at 5 am trying to think of where to place my new acquisition, hubby woke soon after and and we discussed the options for placement of the ladder that I had mulled over.  Well, none of my ideas were very successful so we decided to take the photos in our entry and then move it to the area where it will reside, once we find that spot.  I really wanted the ladder in the family room so I could see my chosen quilts displayed  everyday, and that is where we concentrated our search.  Hubby finally spotted an area behind the loveseat that might work, and all we would have to move was a floor lamp.  Hubby was liking this idea more every minute because moving the lamp would be alot easier than moving furniture.
We placed the chosen quilts on the ladder and snapped this shot.  A display for Valentine's Day and then hubby carried the ladder to its chosen spot and is now placing bed risers under the legs to raise it up a little to show off the bottom quilt.  And the bonus is that the bottom shelf allows more quilt storage.
I will need to change these out often so they will not suffer light damage.  They are not directly in the sunlight, which is always a concern for me.  But for now, hubby and I are both pleased with our work.  Have a great day and enjoy your journey.

Saturday, January 19, 2013

Keeping Projects Organized

With so many wonderful fabrics, patterns and ideas for new quilts I find I can't limit myself to making just one project at a time.  I find myself having a little pile of this project and that project surrounding my sewing machine to the point where I no longer have room to sew.  I had to come up with a solution that would work where I could have the projects close at hand without covering my work surface.
Depending on my mood I may either listen to music, watch a tv show or my dvd of  the first 2 seasons of Downton Abbey, or a you tube video on a quilting technique.  My favorite for you tube is to watch a free motion quilting video while practicing the same design on my sit down machine.  So at any given time I may not want to leave my view of the tv screen but may have completed the elements I had been sewing so that is why I like to have several projects at my finger tips. But neither do I want to stop sewing so now I can reach down, grab a different project and keep sewing.

One of the things I look for at thrift stores are those nice clear plastic cases with handles and other prettier handled cases. I use them to organize the various type of blocks I am making and as they fill, I move the contents to a larger marked container that I keep on a shelf and then replace the small handle container with the necessary cut pieces to construct more blocks.  I also use them for my carry along projects. I may have 3 different cases with one project divided among them.  One for the car, one for beside my tv chair and one  ready in case I have completed the car case and need to exchange it in a hurry.
I have plans to attend a retreat in the near future and I am filling these cases with cut pieces of projects and the instructions to have ready to just grab when the time comes.
With teaching on a daily basis I find I have bits and pieces of time between students.  I find this time allows me to get a considerable amount of cutting done for various projects in between the students and it is something I can stop instantly when the door bell rings.
Attempting to keep organized allows me to get as much done in a day as I possibly can and not get tired of the same project.  I  find working a little on a variety of projects allows me to change the technique I am sewing from one project to another, instead of making for instance, 985 2" Flying Geese all at one time, I find breaking it up with other projects, the quality of work does not suffer from boredom of the endless stack of pieces for a particular unit.
Variety is the spice of life.  Enjoy the variety in your journey.

Friday, January 18, 2013

Before They Melt Away

I LOVE snowmen, each year they come out for Christmas but linger through January before they are tucked away for another year to make way for some bright  red Valentine's Day quilts.  My snowmen adorn my shelves and snowman quilts warm my walls, quilt racks and chairs.

One year I made a Pearl Louise Block of the Month through Cotton Patch Quilt Shoppe in Michigan called "Hot Chocolate Gang".  In each block the snow people have a cup of hot chocolate in their hand.

Another year the quilt was made from The Rabbit Factory Pattern  "Under The Stars."  I chose to put my own twist on this one by making the 3" patches of the Snowmen's quilt "rag".  I just thought it would be cute for them to be sleeping under a rag quilt.  To do so I added 1/2" to my blocks and made my "rag" seam allowances 1/2" when sewing the blocks together.  There had to be a special adjustment to the half square triangles but that will be another post as today hubby and I are striking out for a road trip to find some new thrift stores and flea markets.  I will share if I come across any wonderful finds.
Hope you have a great day and don't forget to enjoy your journey.

Thursday, January 17, 2013

15 Minute Gift Idea

Did you forget your friends birthday til the last minute or do you need a quick gift for your Secret Sister at Quilt Guild tonight?  Here's an idea that will only take a few minutes to make without a lot of prep..
I like to shop flea markets and thrift stores for lots of things, like right now I am in search for sewing cards from the 1950's, you know those brightly colored cardboard figures with holes punched in various places for you to "sew" with the yarn laces.  I do believe that was my very first sewing experience, so I would like to have a set for "old times sake". I recently found a set from the 60's with plastic laces but they just wasn't right  for me, so I passed them up.  But it;s all about the thrill of the hunt and I will keep searching.
Another thing I search for that is a little more available is those heavy tea light holders like this one because they make great pin cushions.

I cut a four inch square, round the edges, don't worry about getting it perfectly round just start trimming.
Run a basting stitch 1/4" around the outside edge and gather up and start stuffing.  My favorite stuffing for pin cushions is wool because they keep your pins sharp, but this particular pincushion will be mainly decorative for me, so I used fiber fill in this one.
After it is pretty full I will secure my basting threads leaving an opening just large enough for my finger and then I will continue stuffing until it is very firm and will hold no more stuffing material.  I put a little hot glue in the bottom of my tea light holder and place my pincushion in the holder.
I was prompted to make this pincushion to house the lovely pins displayed in this photo.  The pins were a gift from one of my student for Christmas this year.  I knew they needed a special place so thought this glass holder would work nicely and only took me 15 minutes to make.  This will reside on the table beside my tv watching chair and will be readily available if I need a place to place a pin while sewing during tv time.
Enjoy your day....

Wednesday, January 16, 2013

Piecing An Applique Unit

There are times when appliqueing, that it is more conducive to piece the unit instead of appliqueing each individual part to the background.  Such was the case for my barn on my cancer quilt.  A few posts back I constructed the barn quilt and now the barn itself is completed, complete with barn quilt.  I thought I would go over the steps I took to build my barn.
I first sewed the fabric chosen for the top of the barn around my barn quilt. I then traced the unit onto freezer paper and pressed it onto my fabric unit, taking special care that the barn quilt was in its correct position under the freezer paper.
I placed this onto my cutting board and trimmed to a 1/4" on all sides, usually I would use a smaller seam allowance for applique but since I would be piecing I wanted the accuracy.
Laying this aside, I proceeded to create the roof. by pressing my freezer paper shapes to the my fabric.  My fabric was printed with different scales of pattern, so I selected the areas that was best suited for my project.  They were then trimmed and ready to be sewn.
The freezer paper allows me to line up where I need to sew and creates more accuracy.
With the top of the barn completed I was ready to construct the bottom half, so I searched my studio for tools to not only give me the accurate 7/8" for the "lumber" but to also allow me to see the grain on each piece.  Much to my dismay nothing was working successfully.  I needed a fussy cut template.
I got a piece of template plastic cut it 7/8" wide then drew a 1/4" on each side and cut out the middle.  Now I could see just how each plank would look.
After I traced and cut my "lumber" I played with the positioning so I could get it like I wanted it to look. I sewed each piece together, and once the unit was constructed, ironed it's freezer paper template to it and trimmed.
After I did reverse applique on the windows and prepared the hay for the barn, I sewed the pieces together and was ready to sew the top and bottom of my barn together.
The freezer paper provided a guideline for pinning the pieces to be sewn
I'm starting to get excited now, the only thing left is to prepare the edges for applique.
I am still uncertain as to whether or not I am going to applique the units by hand or machine but did realize with so many pieced seams that needle turn would be very difficult so either way I choose I decided to glue the very tips pf the edges.  Making sure to keep the glue away from the fold if I choose to hand applique.
After placing the glue I rolled the edges back to my freezer paper, clipping at corners and trimming bulky seams when necessary.
With the process complete I can FINALLY remove the freezer paper.
I still have to hand embroider between the planks of the bottom of the barn and along the roof edge to give it more dimension.  I had thought there would be more definition between the board because of the seams but not the case.  A lesson learned.  Oh, the reason for the two colors of boards is the ones on the right are closer to the sun.
Hope you enjoy your day, and don't be afraid to challenge yourself......... it can be fun!